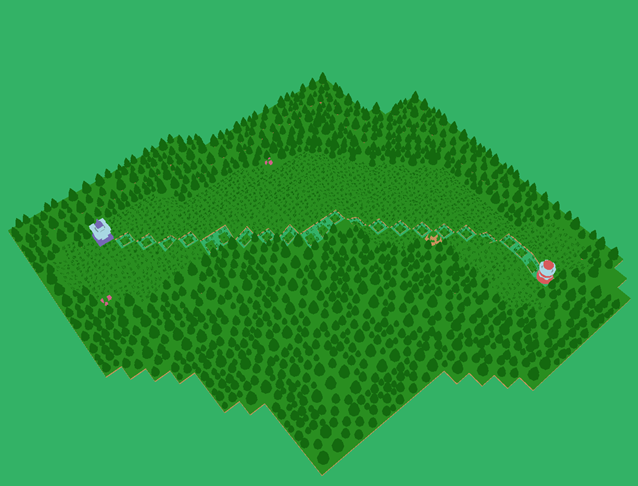
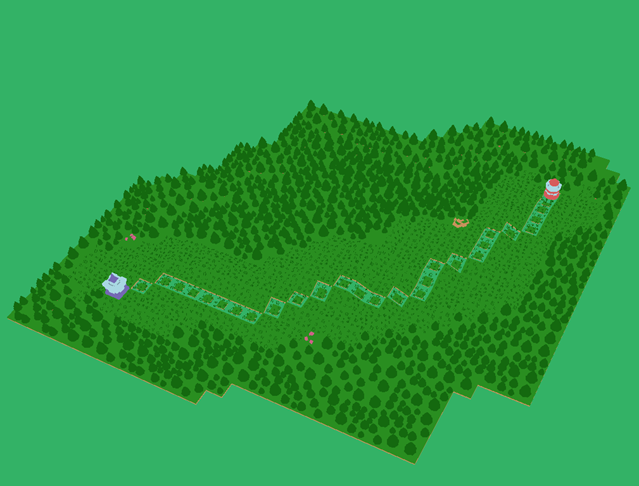
A* path smoothing

Custom engine -- C++

▚ Project summary:


In this Prototype, I implemented custom path smoothing to make the generated path more usable in our prototype tower defense game.

I worked on 2 different version of path smoothing, to make the A* more usable in our game.

Page contents:
·A* with basic checkpoints smoothing
·A* with basic checkpoints results
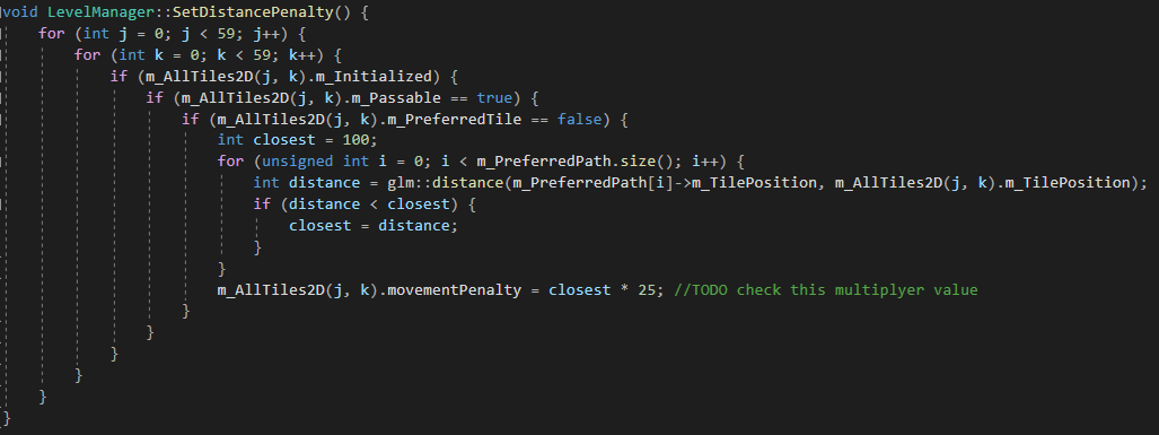
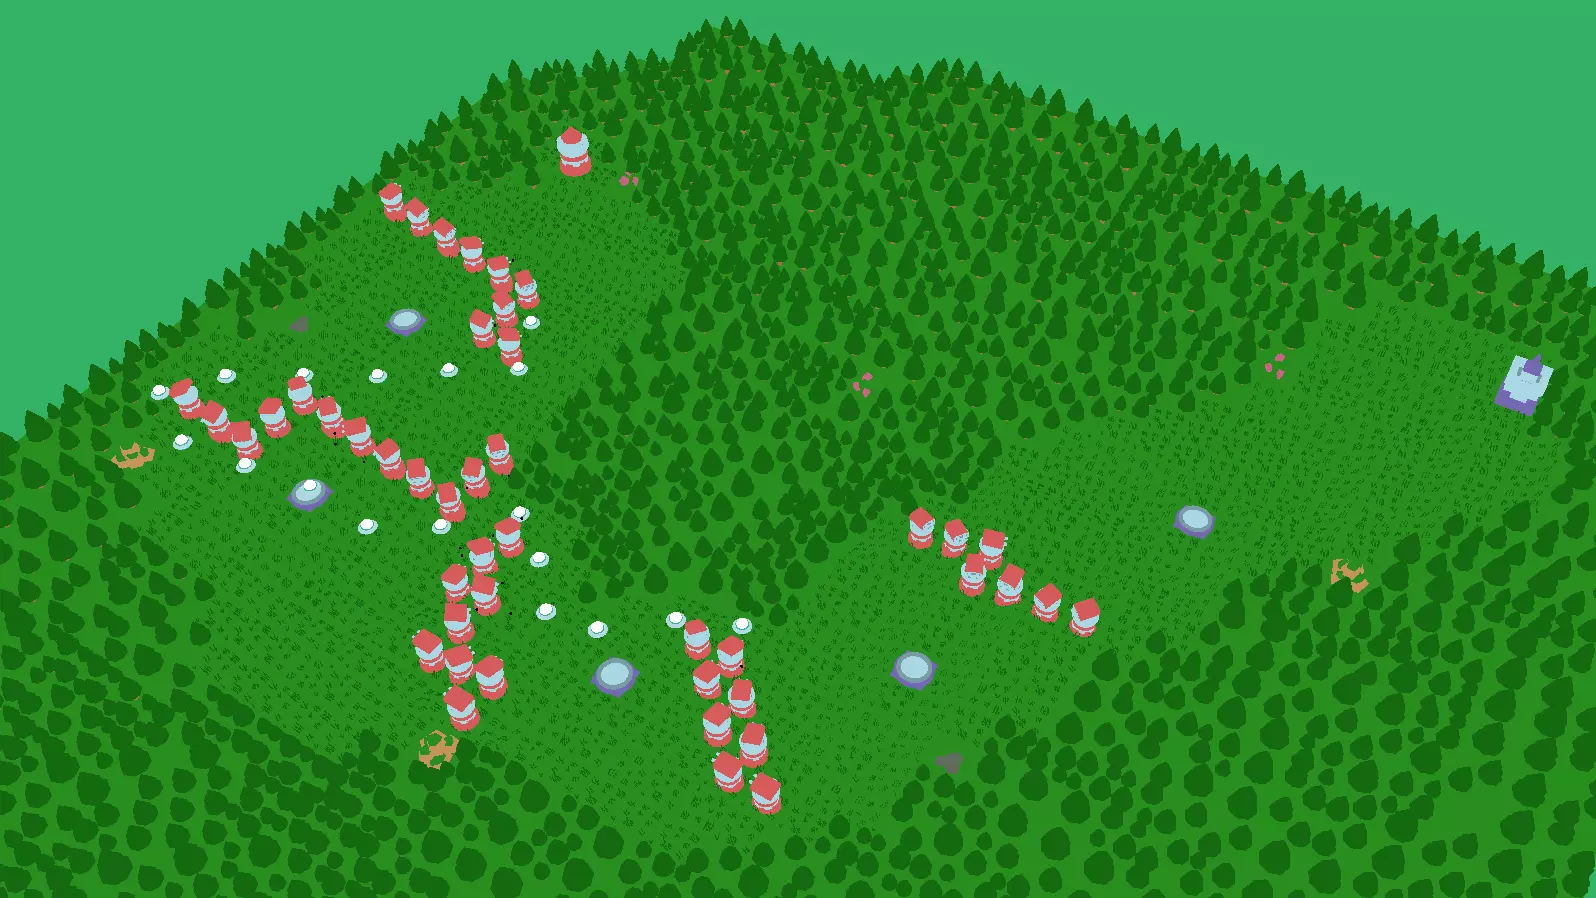
·A* with weights
·A* with weights results

▌Specifications:

Project type: Buas school project
Released: november-2020
Platform: PC,Windows
Time spent on project: 1 month (on the A*)
Engine and Tools: Custom engine - C++

▌My contributions:

○ Implemented A*
○ Implemented A* path smoothing using desired checkpoints
○ Implemented A* with weight smoothing

▌Project goals:

○ Understand A*
○ Understand different path smoothing/ A* result smoothing techniques.
○ Apply this to our project, to make the gameplay more fun

▚ A* with basic checkpoint smoothing


I stepped away from Sebastian Lague his pathfinding video’s when starting to implement path smoothing.

Due to time being short and other gameplay features needed to be completed, I chose to implement a more easier first iteration of some kind of path smoothing.

I chose to implement a "checkpoint" system.

To define the checkpoints and their tile location, I used Ogmo and C++ json parsing.
Ogmo is a 2D tile editor, which exports a clean and usable json file.
Inside Ogmo, the yellow tiles indicate all the checkpoints and hold a integer indicating the order of the checkpoints.

I first decide the amount of “checkpoints” or targets, by reading the Ogmo extracted/Json checkpoint array size. Now I know how many checkpoints are in the json file.

I create a vector and resize it to the array size.
I use a for loop, to order all the checkpoint elements so I can set the right positional data in the right order.
I use the positional data to store the “checkpoint” tile in the resized array.
I then add the already known enemy end tile to this array as well.


Now that all the checkpoint tiles are set, and stored in the m_AllTargets I first set the beginCheckTile, which is the already defined start tile. and set the TargetCheckTile to the m_Alltargets first element.

I use a for loop to call the FindPath using the BeginCheckTile and TargetCheckTile. After a segment is calculated, I set the BeginCheckTile to I ( which is the next index) and set the TargetCheckTile to I + 1.

Using this for loop, every segment of the full path is calculated accordingly, without any checkpoint limitation.

At this stage of the project, short ranged A* is called multiple times in-between the checkpoints.

▚ The result


The result is way smoother! In the video below, the enemies following a more gameplay friendly path.

A* without checkpoints

A* in-between the checkpoints.

▚ A* with weights


At this point the pathfinding used checkpoints and (relatively) short distance A* between the checkpoints to keep the enemies in the middle of the path.
This worked pretty well but is obviously a workaround before having fully smooth pathfinding.

The main issue with this path smoothing solution is that whenever an obstacle or tower is placed in such a way that the “checkpoint” tile is not reachable, the pathfinding crashes/ never reaches it’s goal.

This was really limiting either the pathfinding or the building/object placement, So I decided to rework the pathfinding.

To fix this implemented my own version of the Sebastian Lague's theory on path smoothing (Video link: Link).

How it works: I do need the preferred path/ middle path to be defined. In this project, we as a team would like to specify beforehand what the preferred path will be.

In this case, I still use the checkpoints and A* to generate the previously used preferred path. I save these tiles inside a vector. 
In the video, it’s explained that by just adding a certain value (penalty value) to the movement cost variable calculation, the path can be influenced. Defining this penalty value is key. 

I define each tile’s penalty value by saving the lowest distance from all the defined preferred path tiles. This distance indicates the closest value to a preferred tile (that’s near that tile). 

This means that the closer enemies stay around the preferred path, the lower the movement penalty will be.

▚ The result


The multiplier can be adjusted. the higher the multiplayer, the higher the tiles movement penalty would be when being far away from the path.

Now when (re)calculating the full path, it actually uses the begin and end point, instead of using checkpoint for checkpoint.

As you can see in the video on the below, even when a checkpoint is fully blocked, the enemies still find their way (when possible) to the target.

As you can see, the enemies try to stick to the preferred path, however, when the walkaround to such a checkpoint tile would be ending up taking even more penalty values/ movement values, it instead takes a more logical path towards the target, while steadily moving back to the preferred path.

I tested the time it took to calculate the full path, and with this example it’s steadily around 2.2/ max 3 millisecond. The performance go slightly down with large levels, but that’s expected.


This really works well, and I am quite happy with the improvements, especially because this will be used in our next project.